I am now ready to start installing a test install. Note that unless you have exactly the same hardware as I do, you will have slightly different steps to do.. but hopefully it should be clear enough what to do.
- My first step is to get into the hardware's BIOS. I find this is useful for making sure that the hardware is set up correctly. Getting into the BIOS can be an exercise in frustration with many reboots while you figure out which keystroke gets the BIOS working. For this laptop it was F2. [ other boxes I have seen use everything from the ESC key to Alt-F10.] Once you get into the BIOS you should see a screen something like this:

- Once into the BIOS I check to see what boot options are available. As seen in the next photo, this laptop has UEFI boot enabled and sees the SanDisk 16GB stick as a boot option.

- For the first round of installs, I moved the USB key from the third boot option to the first one. This UEFI does not seem to have any Secure Boot options that I could find. I am guessing that this hardware predates that standard. So it is time to save the current settings and move on.

- The system should now boot the USB key and I was presented with a text screen similar to the below. For my first attempt, I just allowed it to boot the normal selection. [If you have problems, it is good to try the second option which will check to make sure that your download was correctly written to the dvd or usb key.]

- As suspected this box's EFI doesn't understand secure boot. I am free of the great kernel conspiracy :). On the other hand, it is clear I use a Motorola Droid phone.

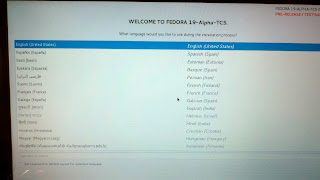
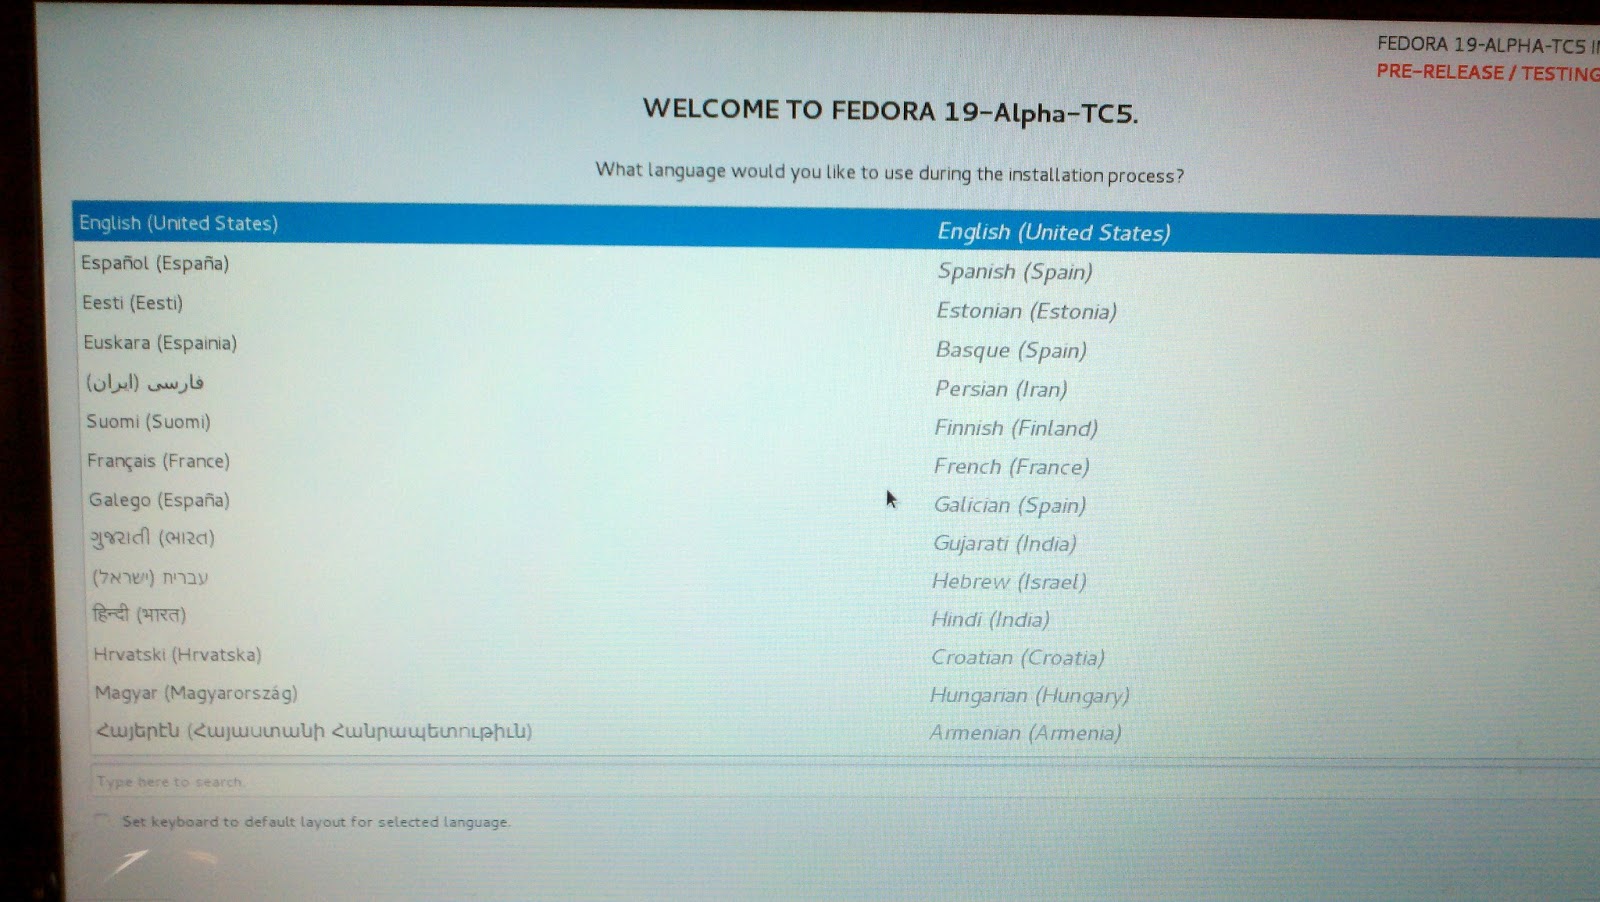
- After some other text, the system will flicker into a graphical Welcome screen. From here one can choose the language and keyboard structure. Normally I choose English (UK), but will use the default US for this install.
- The obvious Sausage Grinder warning. This is our last chance to back out... if we don't want to keep installing this pre-pre-Alpha.

- Being the brave souls, we are... the next screen presents us with a network setup screen. This is where I ran into my first crashing bug. In TC5, if I selected a wireless network and just blindly attach to a network, anaconda will crash due to a hostname problem. [Get used to this little pop-up. It is something you will run into a lot.]


- Since I was at a crashing bug, it is time to start working through the steps of figuring out what the bug is and how to deal with it. My first step was to search via google "site:bugzilla.redhat.com anaconda crash" and learned quickly that was way too much information to try. A better tactic was to log into the Freenode IRC servers and /join #fedora-qa. There I was able to explain the problem I was seeing, and ask if there was a workaround. This was a known bug, and the workaround will be to put a hostname other than the default localhost.localdomain.
- On the second time through the installer, I chose my favourite movie: Totoro. I recommend anything but your password. I was able to join the local wireless network and move to the next screen which is the general installer setup screen:

- In this screen there are multiple items to deal with. I start by correcting the timezone for the install. Clicking on Date and Time gives us a very very pretty screen where you can click around to find the International Timezone city nearest you. For me it is Denver, Colorado. Notice that the "Done" button is in the upper left hand corner. Remember that because 20 years of training kept me looking in the lower right :).

- Since the keyboard was the US one I use, I went next into Software Selection which brings up a screen with quite a few choices to select. I found it interesting that I can only choose larger selections.. I could not have KDE and GNOME set up for this install. I guess I will do this post install.I decide I want the full GNOME subselections just to see what that will entail.


- Next it is time to select where to install to. The disk selection screen shows both the internal disk drive and the USB sans key. Select the internal and go back to the Done button at the top-left. [I will repeat this because it was the point that needed the most muscle memory to beat.]

- Because the internal disk has stuff on it and is full, a pop-up shows up asking how to fix the conundrum of installing on 0 MB of free disk space.

- I decide to click on reclaim space as I am planning on just letting the OS do its thing for this initial install. As can be seen, I already have a bunch of Linux on the system. I click on the disk drive and tell it to delete all content.I also tell it that I want to encrypt my disk which brings up the password selection. I HIGHLY recommend doing this step. You never know when a laptop will walk, and there is a large underground market in selling disk drives from laptops to be "imaged" by gangs to look for passwords, credit card numbers, etc.


- Getting back to the main selection screen, we have no more Yellow markers and can click on Next.. which is in the lower right corner. I am guessing there is a design reason for this, but I don't know the theory for it. [This isn't a gripe. You have to experiment to find new things.]

- The next screen starts the install. The disk drive is repartitioned, and the packages are installed in precedence order. During this time, I have two yellow markers at the top saying I need to set the root user's password, and create a new user.

- Setting the root password is quick and easy. Just write the same phrase into both the top and the bottom. I select phrases from an XKCD Password Generator because they are strong and easy to remember.

- Creating the user is similar, but here we have a couple other items we can answer (do we want it to be an administrator,etc.) Currently for the early Alpha Test Candidate releases, I recommend skipping this section. There is a reoccurring bug where initial-setup requires you to create a user after first boot even if you set one up before hand.

- Here is where I encountered my next crashing bug. The laptop has EFI turned on so I could get the sandisk found but the Alpha TC5 kernel has a problem when it sees weird EFI settings in order to not brick the system like the Samsung laptops can be.
- The work-around for this laptop is to reboot, turn off EFI in the BIOS, and then get the laptop to boot not from the boot menu but from the Save and Quit menu (obvious isn't it.)

- Going through the install steps again, I get past the previous crashing bug and the system finishes installing. I hit reboot and finish this blog post off.


No comments:
Post a Comment