2013-04-25

LVM and the things I forget when my allergies are bad.

I want to thank the following bloggers for helping me today when my brain completely forgot my lvm commands. I blame old age (400+ years is quite a bit of memory to hold around.) but I figured I needed to make up a list for myself since I keep forgetting and having to go through the commands each time.


First make sure there is a partition. The disk isn't too large so we will use trusty old fdisk.
fdisk /dev/vdb

Device contains neither a valid DOS partition table, nor Sun, SGI or OSF disklabel
Building a new DOS disklabel with disk identifier 0x3842498f.
Changes will remain in memory only, until you decide to write them.
After that, of course, the previous content won't be recoverable.

Warning: invalid flag 0x0000 of partition table 4 will be corrected by w(rite)

WARNING: DOS-compatible mode is deprecated. It's strongly recommended to
         switch off the mode (command 'c') and change display units to
         sectors (command 'u').

Command (m for help): p

Disk /dev/vdb: 268.4 GB, 268435456000 bytes
16 heads, 63 sectors/track, 520126 cylinders
Units = cylinders of 1008 * 512 = 516096 bytes
Sector size (logical/physical): 512 bytes / 512 bytes
I/O size (minimum/optimal): 512 bytes / 512 bytes
Disk identifier: 0x3842498f

   Device Boot      Start         End      Blocks   Id  System

Command (m for help): n
Command action
   e   extended
   p   primary partition (1-4)
p
Partition number (1-4): 1
First cylinder (1-520126, default 1): 
Using default value 1
Last cylinder, +cylinders or +size{K,M,G} (1-520126, default 520126): 
Using default value 520126

Command (m for help): t
Selected partition 1
Hex code (type L to list codes): L

 0  Empty           24  NEC DOS         81  Minix / old Lin bf  Solaris        
 1  FAT12           39  Plan 9          82  Linux swap / So c1  DRDOS/sec (FAT-
 2  XENIX root      3c  PartitionMagic  83  Linux           c4  DRDOS/sec (FAT-
 3  XENIX usr       40  Venix 80286     84  OS/2 hidden C:  c6  DRDOS/sec (FAT-
 4  FAT16 <32M      41  PPC PReP Boot   85  Linux extended  c7  Syrinx         
 5  Extended        42  SFS             86  NTFS volume set da  Non-FS data    
 6  FAT16           4d  QNX4.x          87  NTFS volume set db  CP/M / CTOS / .
 7  HPFS/NTFS       4e  QNX4.x 2nd part 88  Linux plaintext de  Dell Utility   
 8  AIX             4f  QNX4.x 3rd part 8e  Linux LVM       df  BootIt         
 9  AIX bootable    50  OnTrack DM      93  Amoeba          e1  DOS access     
 a  OS/2 Boot Manag 51  OnTrack DM6 Aux 94  Amoeba BBT      e3  DOS R/O        
 b  W95 FAT32       52  CP/M            9f  BSD/OS          e4  SpeedStor      
 c  W95 FAT32 (LBA) 53  OnTrack DM6 Aux a0  IBM Thinkpad hi eb  BeOS fs        
 e  W95 FAT16 (LBA) 54  OnTrackDM6      a5  FreeBSD         ee  GPT            
 f  W95 Ext'd (LBA) 55  EZ-Drive        a6  OpenBSD         ef  EFI (FAT-12/16/
10  OPUS            56  Golden Bow      a7  NeXTSTEP        f0  Linux/PA-RISC b
11  Hidden FAT12    5c  Priam Edisk     a8  Darwin UFS      f1  SpeedStor      
12  Compaq diagnost 61  SpeedStor       a9  NetBSD          f4  SpeedStor      
14  Hidden FAT16 <3 63  GNU HURD or Sys ab  Darwin boot     f2  DOS secondary  
16  Hidden FAT16    64  Novell Netware  af  HFS / HFS+      fb  VMware VMFS    
17  Hidden HPFS/NTF 65  Novell Netware  b7  BSDI fs         fc  VMware VMKCORE 
18  AST SmartSleep  70  DiskSecure Mult b8  BSDI swap       fd  Linux raid auto
1b  Hidden W95 FAT3 75  PC/IX           bb  Boot Wizard hid fe  LANstep        
1c  Hidden W95 FAT3 80  Old Minix       be  Solaris boot    ff  BBT            
1e  Hidden W95 FAT1
Hex code (type L to list codes): 8e
Changed system type of partition 1 to 8e (Linux LVM)

Command (m for help): w
The partition table has been altered!

Calling ioctl() to re-read partition table.
Syncing disks.

Now we need to make the LVM commands.
# pvcreate /dev/vdb1
# vgcreate VolGroup01 /dev/vdb1
# pvdisplay
  --- Physical volume ---
  PV Name               /dev/vdb1
  VG Name               VolGroup01
  PV Size               250.00 GiB / not usable 3.48 MiB
  Allocatable           yes 
  PE Size               4.00 MiB
  Total PE              63999
  Free PE               63999
  Allocated PE          0
  PV UUID               LPL7af-88jE-vJce-JX2A-7zc9-icl9-4DEaQd

# lvcreate -n collabStore -L 200G VolGroup01
# mkfs.ext4 /dev/VolGroup01/collabStore 
mke2fs 1.41.12 (17-May-2010)
Filesystem label=
OS type: Linux
Block size=4096 (log=2)
Fragment size=4096 (log=2)
Stride=0 blocks, Stripe width=0 blocks
13107200 inodes, 52428800 blocks
2621440 blocks (5.00%) reserved for the super user
First data block=0
Maximum filesystem blocks=4294967296
1600 block groups
32768 blocks per group, 32768 fragments per group
8192 inodes per group
Superblock backups stored on blocks: 
 32768, 98304, 163840, 229376, 294912, 819200, 884736, 1605632, 2654208, 
 4096000, 7962624, 11239424, 20480000, 23887872

Writing inode tables: done                            
Creating journal (32768 blocks): done
Writing superblocks and filesystem accounting information: done

This filesystem will be automatically checked every 21 mounts or
180 days, whichever comes first.  Use tune2fs -c or -i to override.

Edit /etc/fstab and we are done.

2013-04-19

Fedora Alpha 19: Important. Must Read. Etc Etc.

While I am working through RC4 to get to the post install parts there is an important question that keeps coming up in the many mailing lists:

Question: Why is Fedora 19 Alpha so slow and memory hogging?!?! [There are various versions of this mostly from people who tried to install it on some system that runs Fedora 18 well.]

Answer: Alphas for Fedora have many debug switches turned on that are not turned on for Beta or Final releases. These flags use more memory, more cpu cycles, and are generally performance degrading. However they allow for the best place to find bugs and give developers the most information on what is actually the cause and reason for that bug. Without them in place bug finding tends towards:

  • User to developer: My app crashed.
  • Developer to User: Ok what were you doing?
  • User to developer: I don't know...
  • Developer to user: Ok tell me when it crashes again and see what you were doing. 
  • User never sees that crash again.
  • User2 to developer: My app crashed...
  • Repeat infinitum.
  • Developer to userN+1: Here try downloading and running this version I have with all the debug flags turned on. Its slow but maybe it will catch it.
  • Repeat sometime.
  • UserN+20: Oh I have a lovely crash dump.
Now tools like abrt can help with this by cutting down many of the steps you see above.. but in the end, many bugs require a special debug running on the users system to find out why some lock thought it was ok to let go of something it wasn't or why some code walked a variable out of memory when 99.9999% of the time it doesn't. However the usability cost of those flags in a system can be horrendous as seen by the many people who are willing to test, but weren't prepared that for some applications or usages.. it was going to be using molasses.

Currently for Fedora 19, the large user of memory is the kernel, and if you are not running into problems, you can disable this effect with a kernel boot time argument of

slub_debug=-

Edited to add: I pressed Post when I meant to save it. Other items that one should use for Alpha testing is 4x-8x recommended regular memory ( I would say that 2GB is a minimum usable and 4GB very workable on x86_64, 1GB/2GB for x86_32) and more CPU (2.5 Ghz Pentium IV class is "workable" but less than that is painful) and more patience :).

2013-04-09

Fedora 19 Testing: First grind is usually the toughest.

This blog is part of a series on installing Fedora 19 and testing its "parts".  This section will be prettified with links to the other parts if I get a chance.

I am now ready to start installing a test install. Note that unless you have exactly the same hardware as I do, you will have slightly different steps to do.. but hopefully it should be clear enough what to do.
  1. My first step is to get into the hardware's BIOS. I find this is useful for making sure that the hardware is set up correctly. Getting into the BIOS can be an exercise in frustration with many reboots while you figure out which keystroke gets the BIOS working. For this laptop it was F2. [ other boxes I have seen use everything from the ESC key to Alt-F10.] Once you get into the BIOS you should see a screen something like this:
  2. Once into the BIOS I check to see what boot options are available. As seen in the next photo, this laptop has UEFI boot enabled and sees the SanDisk 16GB stick as a boot option.
  3. For the first round of installs, I moved the USB key from the third boot option to the first one. This UEFI does not seem to have any Secure Boot options that I could find. I am guessing that this hardware predates that standard. So it is time to save the current settings and move on.
  4. The system should now boot the USB key and I was presented with a text screen similar to the below. For my first attempt, I  just allowed it to boot the normal selection. [If you have problems, it is good to try the second option which will check to make sure that your download was correctly written to the dvd or usb key.]
  5. As suspected this box's EFI doesn't understand secure boot. I am free of the great kernel conspiracy :). On the other hand, it is clear I use a Motorola Droid phone.
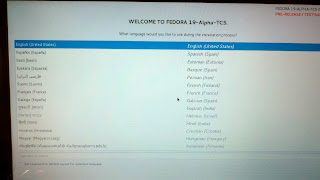
  6. After some other text, the system will flicker into a graphical Welcome screen. From here one can choose the language and keyboard structure. Normally I choose English (UK), but will use the default US for this install.
  7. The obvious Sausage Grinder warning. This is our last chance to back out... if we don't want to keep installing this pre-pre-Alpha.
  8. Being the brave souls, we are... the next screen presents us with a network setup screen.
    This is where I ran into my first crashing bug. In TC5, if I selected a wireless network and just blindly attach to a network, anaconda will crash due to a hostname problem. [Get used to this little pop-up. It is something you will run into a lot.]
  9. Since I was at a crashing bug, it is time to start working through the steps of figuring out what the bug is and how to deal with it. My first step was to search via google "site:bugzilla.redhat.com anaconda crash" and learned quickly that was way too much information to try. A better tactic was to log into the Freenode IRC servers and /join #fedora-qa. There I was able to explain the problem I was seeing, and ask if there was a workaround. This was a known bug, and the workaround will be to put a hostname other than the default localhost.localdomain. 
  10. On the second time through the installer, I chose my favourite movie: Totoro. I recommend anything but your password. I was able to join the local wireless network and move to the next screen which is the general installer setup screen:
  11. In this screen there are multiple items to deal with. I start by correcting the timezone for the install. Clicking on Date and Time gives us a very very pretty screen where you can click around to find the International Timezone city nearest you. For me it is Denver, Colorado. Notice that the "Done" button is in the upper left hand corner. Remember that because 20 years of training kept me looking in the lower right :).
  12. Since the keyboard was the US one I use, I went next into Software Selection which brings up a screen with quite a few choices to select. I found it interesting that I can only choose larger selections.. I could not have KDE and GNOME set up for this install. I guess I will do this post install.
    I decide I want the full GNOME subselections just to see what that will entail.
  13. Next it is time to select where to install to. The disk selection screen shows both the internal disk drive and the USB sans key. Select the internal and go back to the Done button at the top-left. [I will repeat this because it was the point that needed the most muscle memory to beat.]
  14. Because the internal disk has stuff on it and is full, a pop-up shows up asking how to fix the conundrum of installing on 0 MB of free disk space.
  15. I decide to click on reclaim space as I am planning on just letting the OS do its thing for this initial install. As can be seen, I already have a bunch of Linux on the system. I click on the disk drive and tell it to delete all content.
    I also tell it that I want to encrypt my disk which brings up the password selection. I HIGHLY recommend doing this step. You never know when a laptop will walk, and there is a large underground market in selling disk drives from laptops to be "imaged" by gangs to look for passwords, credit card numbers, etc.
  16. Getting back to the main selection screen, we have no more Yellow markers and can click on Next.. which is in the lower right corner. I am guessing there is a design reason for this, but I don't know the theory for it. [This isn't a gripe. You have to experiment to find new things.]
  17. The next screen starts the install. The disk drive is repartitioned, and the packages are installed in precedence order. During this time, I have two yellow markers at the top saying I need to set the root user's password, and create a new user.
  18. Setting the root password is quick and easy. Just write the same phrase into both the top and the bottom. I select phrases from an XKCD Password Generator because they are strong and easy to remember.

  19. Creating the user is similar, but here we have a couple other items we can answer (do we want it to be an administrator,etc.) Currently for the early Alpha Test Candidate releases, I recommend skipping this section. There is a reoccurring bug where initial-setup requires you to create a user after first boot even if you set one up before hand.
  20. Here is where I encountered my next crashing bug. The laptop has EFI turned on so I could get the sandisk found but the Alpha TC5 kernel has a problem when it sees weird EFI settings in order to not brick the system like the Samsung laptops can be.
  21. The work-around for this laptop is to reboot, turn off EFI in the BIOS, and then get the laptop to boot not from the boot menu but from the Save and Quit menu (obvious isn't it.)
  22. Going through the install steps again, I get past the previous crashing bug and the system finishes installing. I hit reboot and finish this blog post off.

Fedora 19 Alpha Testing: What you need to make sausage.

This blog is part of a series on installing Fedora 19 and testing its "parts".  This section will be prettified with links to the other parts if I get a chance.

Here are the ingredients to hardware testing a Fedora release in the Alpha and early Beta stages:

  1. Patience and being able to project patience. Release time is a frantic time for QA and developers, and people get cranky quickly. You will spend a lot of time waiting for answers or fixes, and you may need to explain the problem in detail multiple times, and multiple ways. [This usually happens with visual bugs where each person sees something slightly different due to fonts, monitors, graphics cards, etc.]
  2. You will need an email address that you can use to register to bugzilla and various mailing lists as needed. You can get an email address at mail.google.com, outlook.com, or mail.yahoo.com (or a dozen other ones.) The instructions for doing this is outside the scope of this tutorial.
  3. You will need a bugzilla.redhat.com account. If you do not have an account already, please go to https://bugzilla.redhat.com/createaccount.cgi to set up the account.
  4. You should have access to an irc client of some sort. Currently I am using the Linux version of xchat2 which came set up for the Freenode servers that Fedora and many other Free/Libre/Open Software groups use. I highly recommend registering a nick as outlined at http://www.wikihow.com/Register-a-User-Name-on-Freenode .
  5. You will need some sort of hardware to test with. I am going to use two different systems to start off with. The first system is an already installed Linux box to download and write the ISOs with. You can use Windows or MacOSX if you know what you are doing.. I don't so won't be.
    In choosing hardware you need to make sure you have reasonably  new hardware... I find that hardware over 5 years old is usually too old for day to day testing anymore. Not that the hardware may not be up to the task, but if you run into an issue that could be hardware related, it is probably never going to be fixed.For this round of testing I am going to be using an Asus A52F laptop from 2011. It contains
    • Pentium i5,
    • Intel graphics,
    • 4GB of memory,
    • and an EFI boot menu with its BIOS.
    I picked this laptop up on a clearance sale when the model was being replaced with a newer version. This allowed me to get it for under $400.00 which has allowed for various testing over the years.
  6. Backup media. I am going to be using a USB-2.0 500 GB USB drive, and will be backing up before I reinstall, and then restoring afterwords. I will document how to make backups with Fedora 19 when I get to that stage. 
  7. Some installation media. In the long ago past, I used CD-roms and DVD-roms for this exclusively, but for this release I am using a 16GB San Disk which was on sale. This was useful for testing the early test candidates which had a bug that made them larger than the 4GB that a DVD can hold. 
  8. You will need a test image. You can get these from a mirror of alt.fedoraproject.org (from http://mirrors.fedoraproject.org/publiclist/)
    lftp http://alt.fedoraproject.org/
    lftp alt.fedoraproject.org:/pub/alt> cd /pub/alt/stage
    lftp alt.fedoraproject.org:/pub/alt/stage> dir
    drwxr-xr-x  --  ..                   
    drwxr-xr-x            -  2013-03-21 04:15  19-Alpha-TC1
    drwxr-xr-x            -  2013-03-26 02:06  19-Alpha-TC2
    drwxr-xr-x            -  2013-03-29 04:08  19-Alpha-TC3
    drwxr-xr-x            -  2013-04-04 00:40  19-Alpha-TC4
    drwxr-xr-x            -  2013-04-05 03:41  19-Alpha-TC5
    drwxr-xr-x            -  2013-04-05 08:20  deltaisos
    drwxr-xr-x            -  2012-02-02 12:29  ec2
    drwxr-xr-x            -  2013-01-28 20:48  rawhide-20130128
    drwxr-xr-x            -  2013-03-01 18:45  rawhide-20130301
    lftp alt.fedoraproject.org:/pub/alt/stage> cd 19-Alpha-TC5/Fedora/x86_64/iso/
    lftp alt.fedoraproject.org:/pub/alt/stage/19-Alpha-TC5/Fedora/x86_64/iso> dir
    drwxr-xr-x  --  ..
    -rw-r--r--          260  2013-04-05 05:24  Fedora-19-Alpha-TC5-x86_64-CHECKSUM
    -rw-r--r--         4.7G  2013-04-05 05:23  Fedora-19-Alpha-TC5-x86_64-DVD.iso
    -rw-r--r--         312M  2013-04-05 05:15  Fedora-19-Alpha-TC5-x86_64-netinst.iso
    lftp alt.fedoraproject.org:/pub/alt/stage/19-Alpha-TC5/Fedora/x86_64/iso> mget Fedora-19-Alpha-TC5-x86_64-DVD.iso
    
  9. If the ISO is below 4.2 GB in size, you should be able to cut it to a DVD. In this case though the DVD install is larger than that so it will need to be cut directly to a USB key or booted via PXE or some other method. In this case we will be using a USB key. On the system you downloaded the ISO, we will use the dd command to write to the key.
    $ sudo -i 
    Password: @$@$#@$##@
    # lsusb # find out what the USB is
    # dd if=/dev/zero of=/dev/sdb bs=1024 count=100 # voudou. I do this because it is needed on some keys.
    # dd if=/home/smooge/Downloads/Fedora-19-Alpha-TC5-x86_64-DVD.iso of=/dev/sdb bs=1024
    
    On a USB-2 key, you are going to have a peak write of 15MB/s.. more likely 4 to 8MB/s since the bus is shared between USB devices. Be prepared to wait 5 to 10 minutes for it to finish writing. In a different terminal read the dd man page so you can see how to "track" how much is written if you want.

Fedora 19 Alpha Testing. Welcome to the Sausage Grinder.

Fedora 19 is working through its build cycles with a release scheduled for early Summer of 2014. The current stage of testing is "Pre-Alpha" where QA and Release Engineering are working on getting a release for alpha testing. While Alpha is known to be the most rabid of candidates, it is also the most critical to test on the theory that the sooner bugs are located, the sooner they may be fixed (or worked around).

In order to help this out, I am going to sacrifice my laptop for the cause and put it through various installs as they are released. I am also going to try and log everything so that future readers can follow along if you want to.  

WARNING: Due to the nature of the test candidate releases I am using for these first blogs.. expect a lot of crashes and missing features. Also because these are throw away releases, I am going to use old school testing methods.. pictures of screens are taken by hand camera and will have all kinds of crappy artefacts in them. My wording also won't be Documentation Level standards.. but more like my usual crappy English.

In the end, I hope these turn out to be useful anyway.